Hocus Pocus – How to Decorate For Halloween For Under 20 Dollars

Halloween.  My absolute FAVORITE time of year and favorite Holiday (Thanksgiving is a close second).  I think the reason why I love Halloween so much is my sad, sick obsession with my favorite movie ever – HOCUS POCUS.  Every time the movie is on TV, I get about 4 different text messages from people letting me know it is on.  Some people that I haven’t talked to in years, ex-boyfriends, best friends, co-workers, I without a doubt every time get a text.  It’s sad, of this I am aware.  Why do I love this movie so much? I couldn’t tell you, but I do…so that’s that.

This year I wanted to focus my decorating around my love for witches and Hocus Pocus while still keeping the vintage feel to my living room.  Below are a few pictures of my Vintage Witch Halloween décor.  Since I am a strict budget this year (living on your own ain’t cheap)  I had to make a lot of my decorations.  A lot of the stuff I used was old glass bottles, old books and book pages, candles and dollar store finds.  The only thing I did purchase was some ribbon and a lot of the stuff I had from previous years of Halloween’s past.

I will post some tutorials on how I made some of the decorations this week.

IMG_7890 IMG_7892 IMG_7893 IMG_7894 IMG_7895 IMG_7896 IMG_7898 IMG_7899 IMG_7900 IMG_7901 IMG_7902 IMG_7903 IMG_7905 IMG_7907 IMG_7910 IMG_7911 IMG_7912 IMG_7913 IMG_7915

IMG_7917 IMG_7918 IMG_7919 IMG_7920 IMG_7922 IMG_7924 IMG_7925 IMG_7926IMG_7869

The last picture is my favorite 🙂

Stay Fancy

-Jess

The Stockings Were Hung

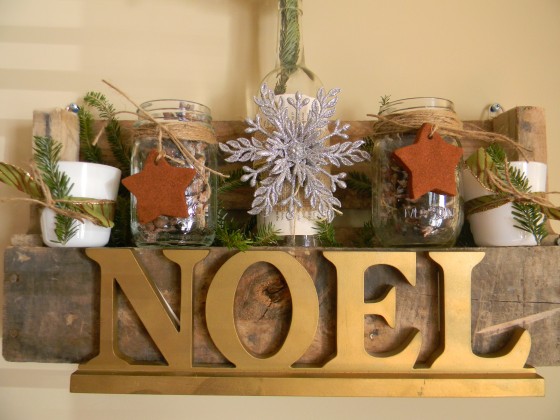
If you haven’t noticed already, my blog has got a slight face lift for 2013. After many comments and emails about how all my projects are inexpensive and where I bargain shop, I decided to dedicate my blog to focus more on how to make exactly what you want, for a fraction of the price. Pocket Of Pennies will reflect DIY projects, tips and where to bargain shop, flea market finds and cheap fashion finds. I will still keep in my diabetic twist on recipes as well 🙂

To start my first blog post under the new face lift – I decided you show you my stockings that I made for Christmas. Since it is the first time my boyfriend and I have been moved out and away from home on Christmas, we both needed some new stockings. I must say, to try to keep down the cost, I tried to sew my own burlap stocking = FAIL. This later lead to a Christmas gift of a sewing machine from Evan (Thank you!) However, since the sewing machine came after the stockings I decided to do the semi-homemade version. Here’s what you’ll need:

Stocking: $8.99
Since Pottery Barn is a HUGE inspiration for me, I decided to take a look in the store while Christmas shopping. To my surprise all the Christmas items were half off!! I got 2 of these White Channel Quilted Velvet Stockings for $8.99 each. They are so well made and will definitely last!

Burlap: You will only need two 14x3in strips however, you can buy 2 yards for $1.50 at Joann Fabrics (using the 40% off coupon) Tip: Download the Joann Fabric app on your phone for coupons you can use right in the store. You can also sign up for their email coupons here. I highly recommend the app, you can download it in your iTunes store right on your iPhone.

Wooden letters: 4 inches. You can pick these up at any craft store in the wood section. They range from 1-2 dollars and you can always use a coupon.

Twine: I got mine for free from my Dad but a whole role will last you a LONG time and only costs about 2 dollars.

Sparkle Snowflake Ornament: After Christmas is the time to buy these! However, I got mine for a buck at WalMart in the Holiday section.

Ribbon: 14 Inches – I got mine off of a gift package for free 🙂

Here’s how you make them:
I first wrapped the wooden letters with the twine to completely cover the wood.
Wooden Letters

I then took my stocking and the burlap and hot glued it on to the top of the stocking. You can also use iron on stitching for a now sew approach.
Pottery Barn Stocking
Burlap Strip

Next, I hot glued the ribbon all around the middle of the burlap.
Burlap Ribbon

Now it is time to embellish. I first hot glued the twine wrapped letter onto the snowflake. I then hot glued the snowflake onto the left side of the stocking. I also added a wooden button I had laying around on the right hand side because it looked a little bare. And there you have it – Personalized Stockings. Do you have any traditional items that you always get in your stockings?

Pocket Of Pennies_Stockings

Pocket Of Pennies_Stockings

Pocket Of Pennies_Stockings

Pocket Of Pennies_Stockings

Pocket Of Pennies_Stockings

Pocket Of Pennies_Christmas

Merry and Bright

Christmas season is here again and this is the first official year that I am able to decorate my own place. However, after purchasing a new car a few months ago, buying all new decorations for our new place just wasn’t in the budget this year.

I get a lot of my inspiration for home decor from Pottery Barn. Their Pottery Barn Holiday Pinterest Page is out of control AWESOME. Just by looking through I was able to imagine what I wanted my home to look like on my type of budget.

The majority of items I used was pine cones and tree trims – BOTH FREE. As I mentioned in a previous post, you can get all the tree trim for free when you cut down your tree or at any place that sells fresh trees. Just bring a bag and go crazy.

The pine cones I have collected throughout the year. I actually got mine while I was babysitting for a family I used to babysit for in college one weekend. I made the boys play a game “Who ever picks up the most pine cones in 30 seconds and puts them in this bad wins!” – Thanks guys, I’m good 🙂 I sprayed them with snow spray to give them the wintery look.

Vintage music sheets are also very in, but why waste money on buying actual vintage music sheets? I printed mine out using this template. TIP: To make this look extra vintage, take a spray bottle, damp the paper with water, gently crumple it up in a ball, open the crumpled paper and lay flat on the floor, cover with a hand towel and iron the paper to flatten – Let dry and you have vintage paper. I sprayed mine with glitter spray to give it an extra pop for the holidays.

For the most part I just reused jars, wrapped them with old book pages, the music sheets, tree trim and OF COURSE burlap. I hope you find these ideas inspiring, they are so easy and CHEAP to make.

We still need our tree and I need to making the stockings but…….. without further adieu, from our home to yours, love Jess and Evan (even though it’s mostly just me) haha

p.s – Can you find the “Hidden Mickey” I designed into our Holiday Card?

441

514

512

508

506

503

497

496

495

494

488

478

475

468

459

453

448

Christmas_EJ

Merrry_and_Bright